Quantcast
Channel: Starter Projects
Viewing all 2631 articles
Browse latest View live

Holiday Tablescape DIY Linen Pinboard

$
0
0

Happy Holidays!!!

I'm sure you've been enjoying the wonderful Holiday Tablescapes that some of the best DIY bloggers out there have been sharing!!!

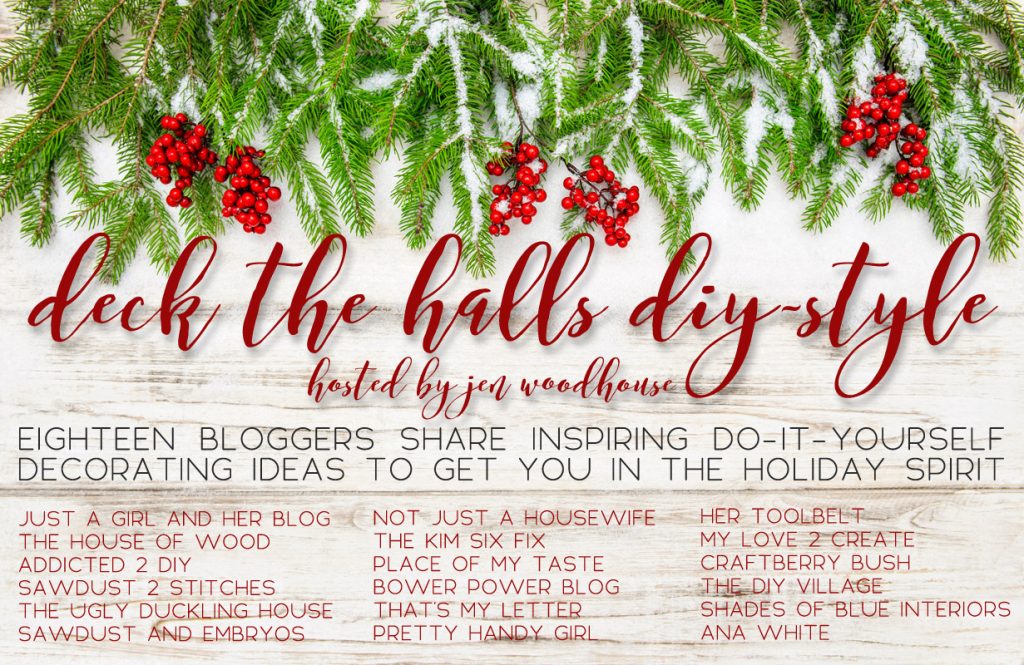
My friend (and super talented DIY Blogger) Jen Woodhouse this year is hosting 12 Days of Christmas Tablescapes, and I'm delighted to be part of it this year!!!

If you haven't already - check out the beautiful Holiday tables - you'll definitely be inspired!!!


And here's the story on mine ---

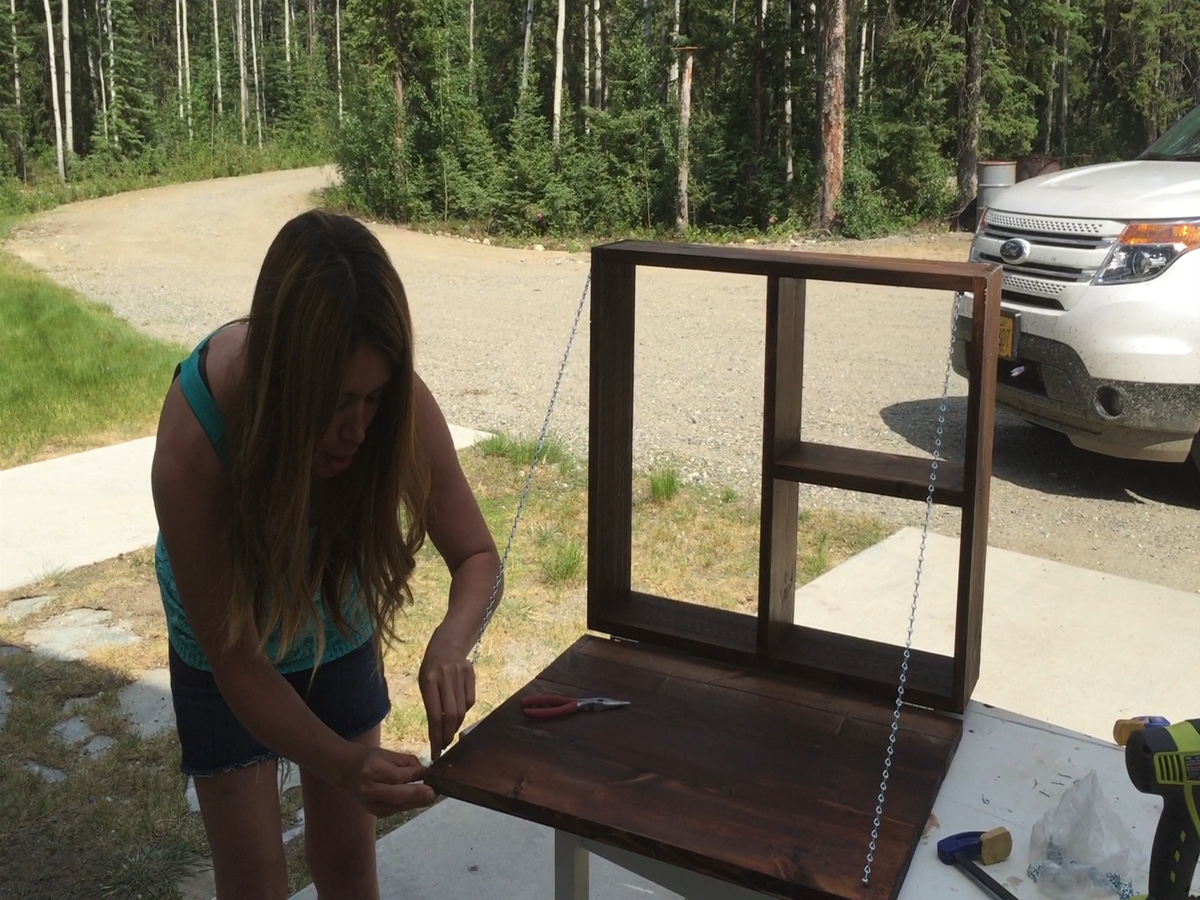
So I live out in the sticks in Alaska, 100 miles on a two-lane icy road from the nearest Walmart ... and a good 350 miles from the nearest Target.  Let's just say shopping isn't an easy thing to do for me.  Getting a centerpiece is an all-day ordeal, complete with a baby crying in the back seat.  God has blessed me with many, many things, for which I am very thankful, but kids that like car seats or taking naps on trips was not one of them.  

As my date for the party got closer and closer, I got more and more stressed about not having a tablescape done, worthy of this party.  Have you seen some of these tablescapes????

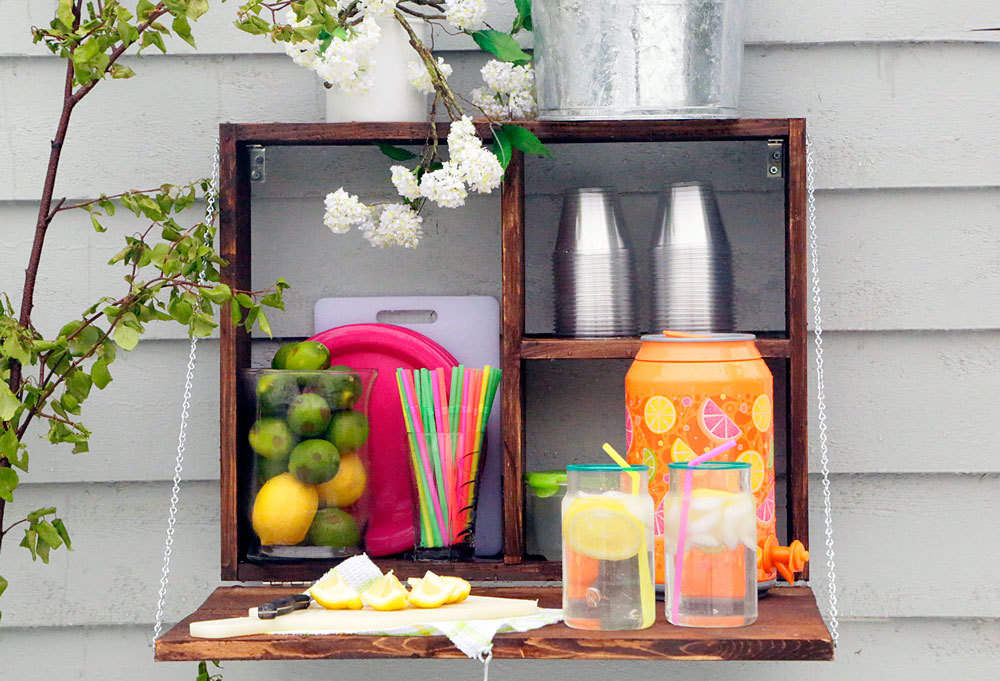
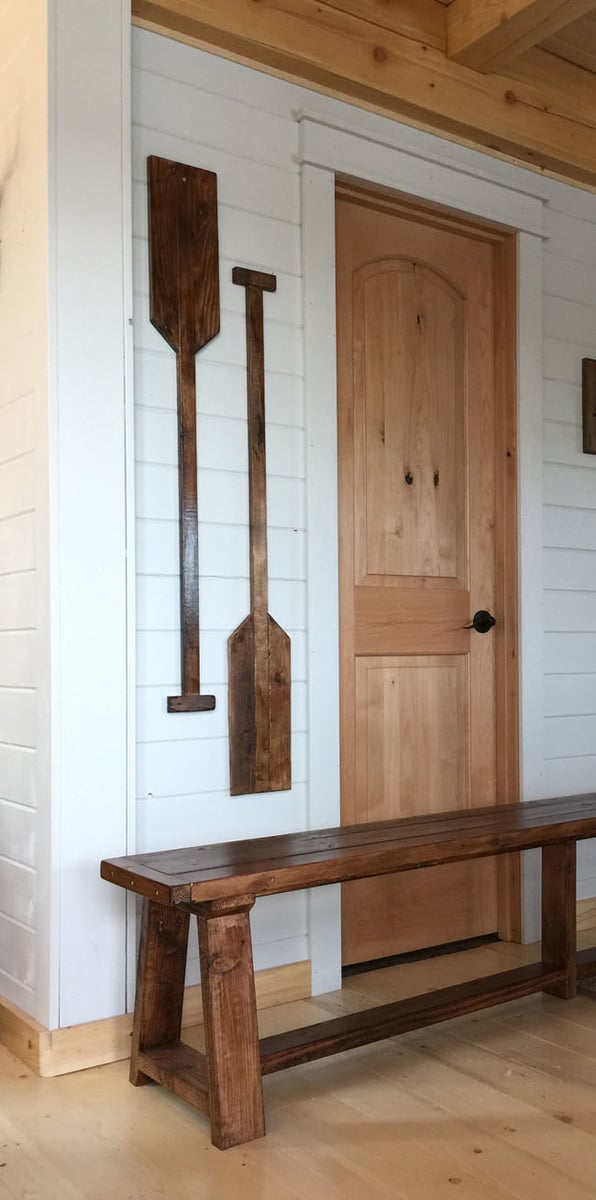
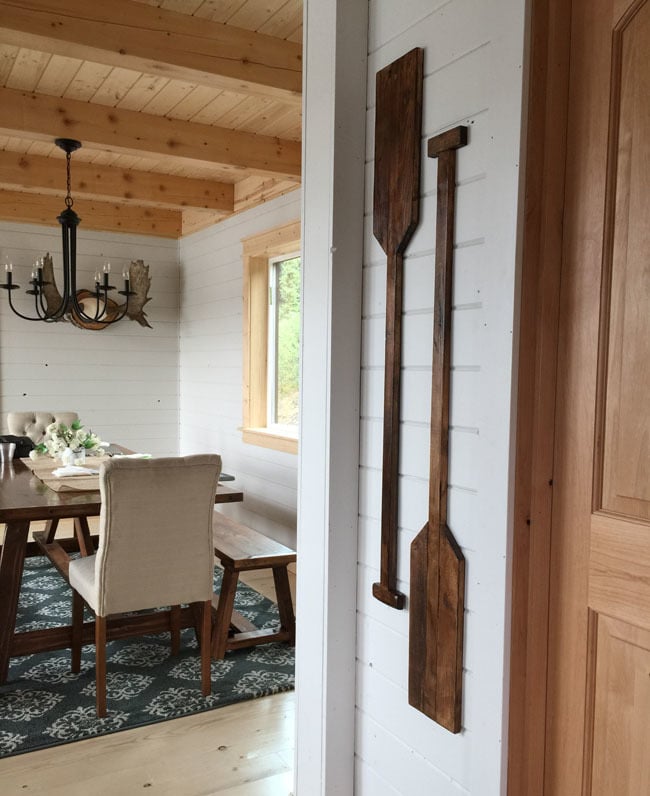
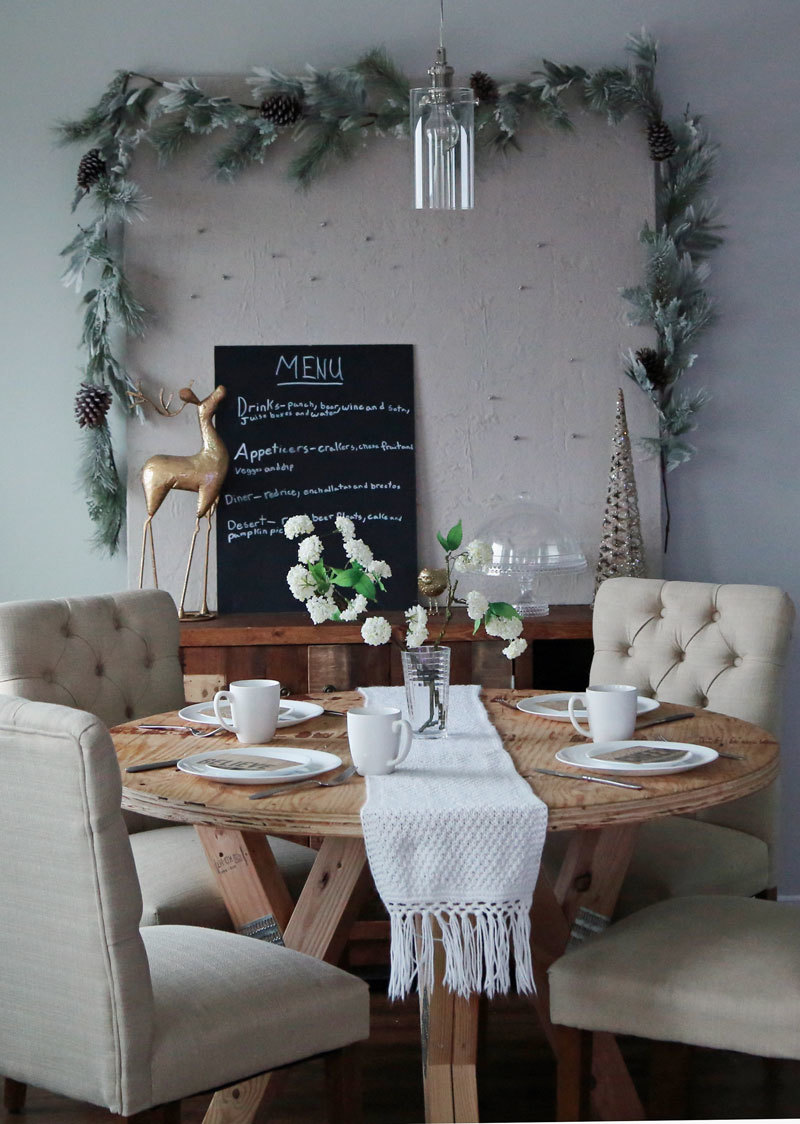
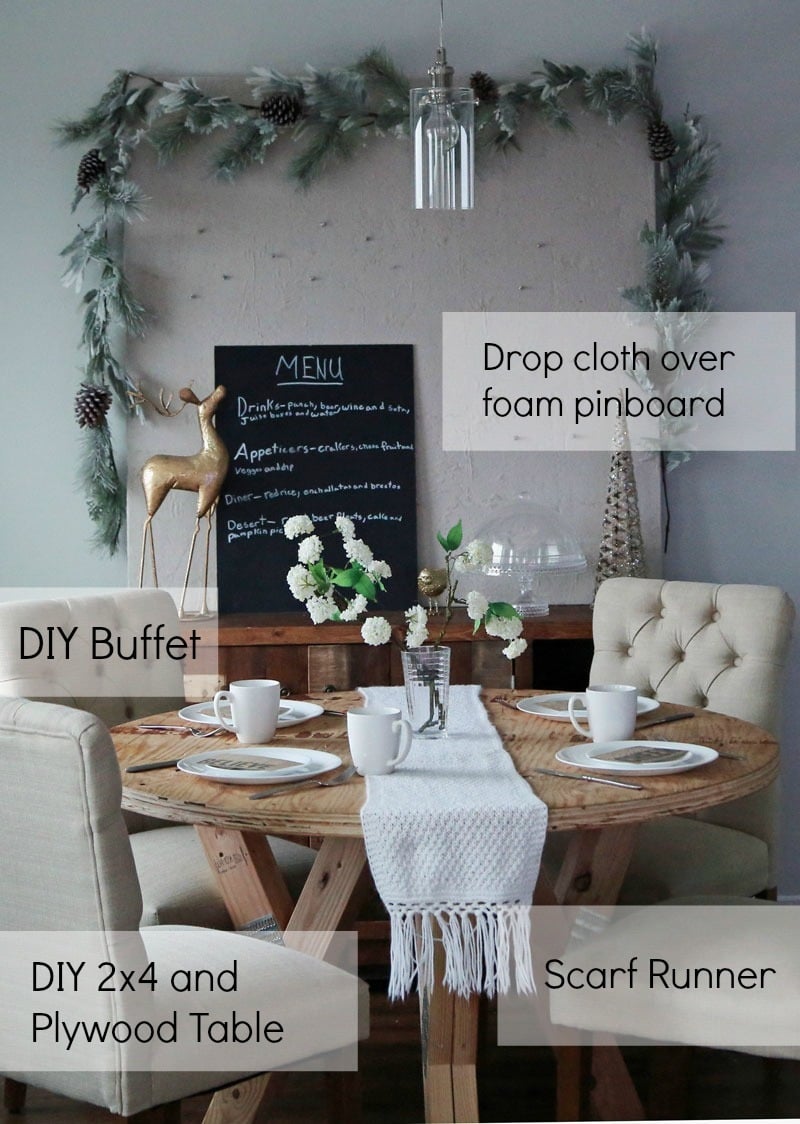
So finally, I decided to just shop my house, and use what I have.

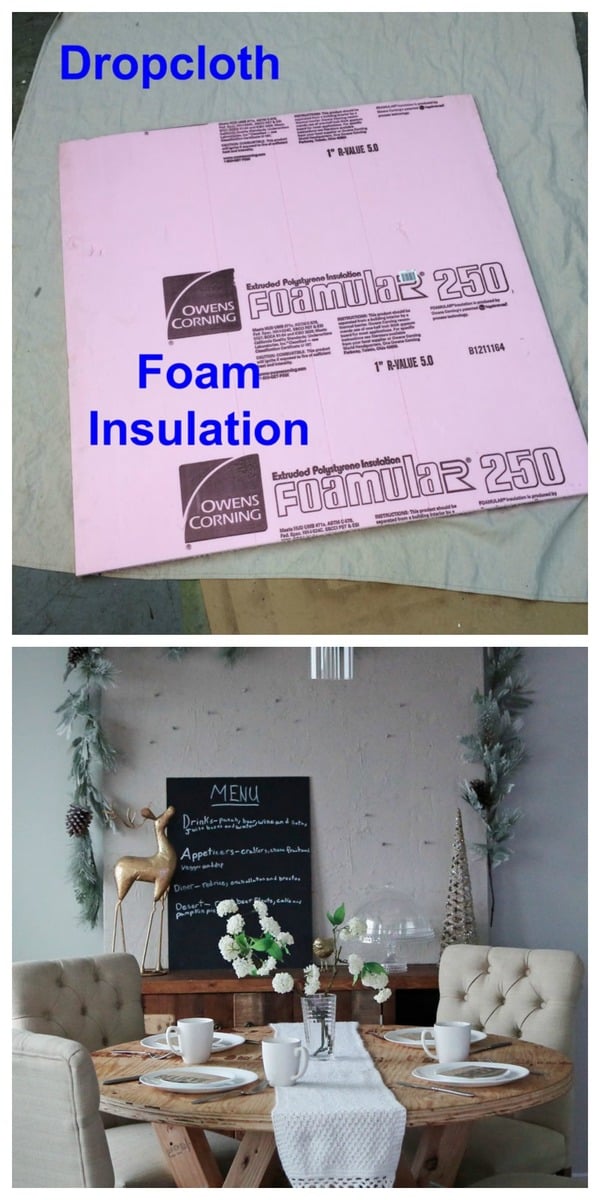
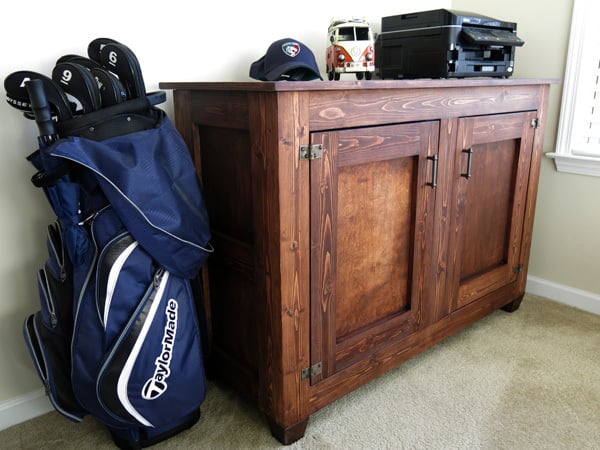
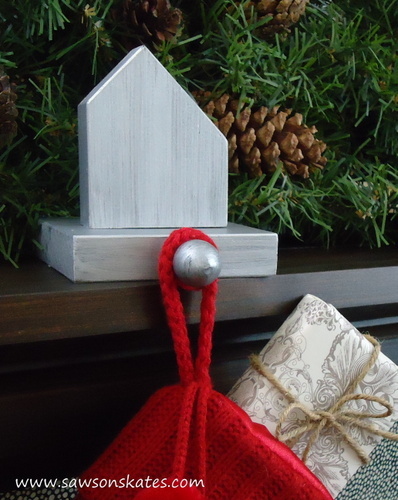
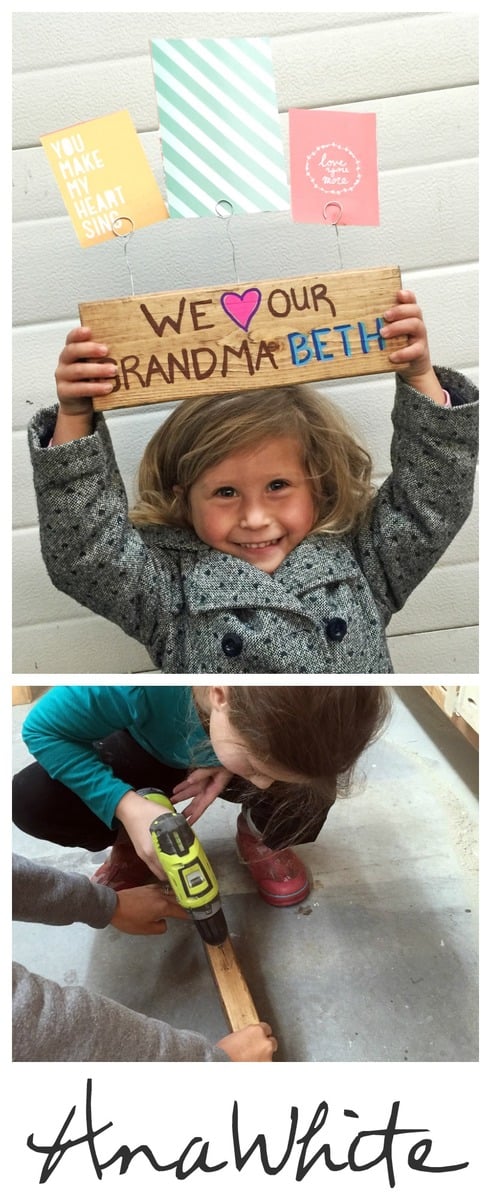
Yes, I have Corelle dishes.  Yes, that's my babysitter's scarf that she just happened to be wearing on the morning of this photo shoot.  Yes, that's the baby's changing table turned into a buffet. Yes, that's a table made out of 2x4s and plywood.  And yes, that linen pinboard is really just a giant piece of foam covered in a drop cloth (tutorial on the pinboard below). 

Perfect isn't possible for us right now.

But beautiful and welcoming sure is.

Hope this post inspires you to shop your house and use a little DIY creativity to make your home a little more beautiful and welcoming this holiday season.

Have the Merriest of Christmases!

Love Ana and Family


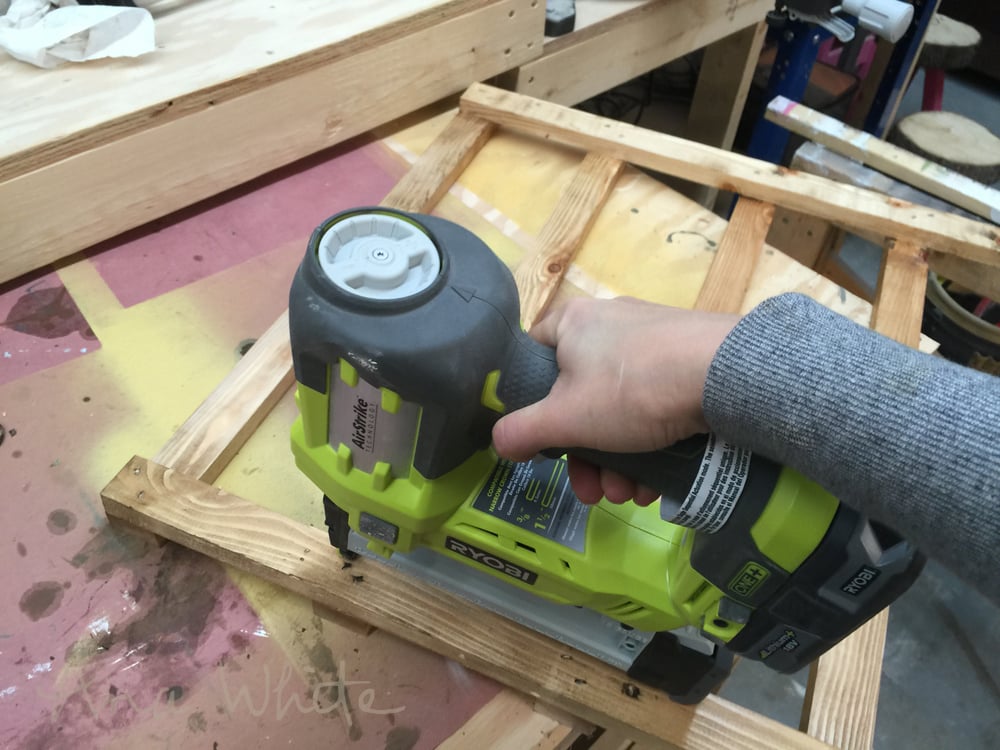
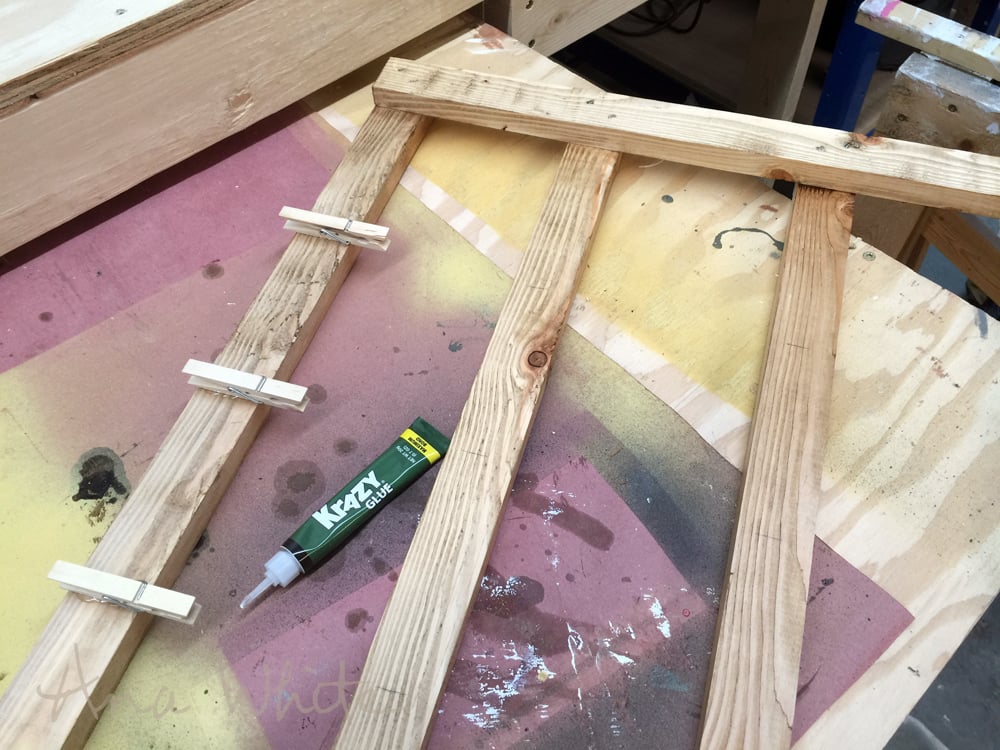
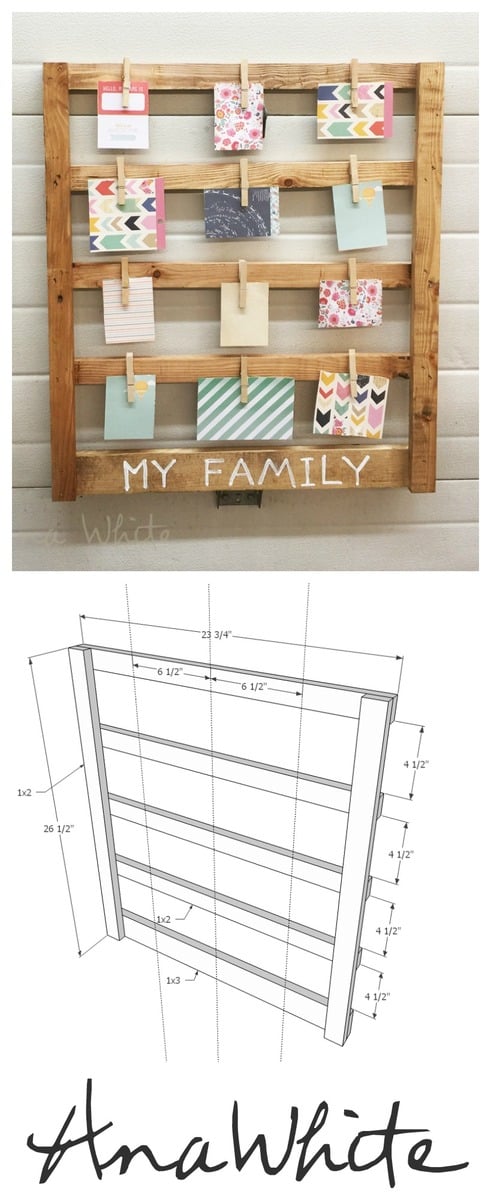
PS - Check out below how I DIYed that "linen" pinboard too!


Office Cabinet

$
0
0

Plans for my Office Cabinet build.  First full plan I have done for others to follow so please excuse any instructions missing and let me know of any questions so I can help you.

I wanted a cabinet primarily made from 1 by 4 no2 whitewood.  I chose this wood as I knew the grain would show through the stain well and would also provide a cost effective build.

I have tried to ensure all steps are covered in these plans but if you find any errors in the plans or have a question then please email me at info@andrewharriswoodwork.com to let me know.

Please read all instructions before cutting wood as shown below.  I suggest some pieces are cut as you go to ensure a tight fit.

You can download a copy of the plan from http://www.andrewharriswoodwork.com/free-plans/


Floating Boxes Nightstand

Dog Leash hanger

Fold Down Serving Station with Home Depot DIHWorshop

$
0
0

Happy Friday Woodmakers!!!

Thanks all for the support for June's Do-It-Herself Workshops that I hosted for the Home Depot!

A special thank you to the Anchorage, Alaska store for letting me be part of such a fun evening!  We all had a blast and can't wait for the next workshop!

For those of you who weren't able to make the Home Depot DIHWorkshop this month, but loved the project -

I'm pretty excited to share with you today how to build it at home too!

This one is really easy -

You'll need about 10 feet of 1x6 boards.  Just cut into six pieces (per cut list below)

Apply glue at all joints (very important since we are stapling)

Then just staple all the boards together.

And I got it all wrong in the video - I actually used Varathane Dark Walnut for the stain.

For the hinges, I ended up deciding to place on the outside, on the bottom (project is upside down backwards here).  I did this because when closed, the front covers the entire project.  The tradeoff is when the project is open, the bottom shelf is not level with the fold out portion.  The other option is to cut your front 3/4" less in size (18" x 24") and hinge on from inside.

I also changed things up a bit and placed my chain supports on the outside - I redid the chain shown on the upper right photo so both are on the outside.  The reason for this is when closed, the chain hits the small shelf.  If you used perhaps smaller chain, wire, or s 1x4 for the shelf, you wouldn't have this issue.

Then I just used L brackets to attach to the wall - I recommend four, one in each corner, for optimal stability.

For the closure, I added a hook and eye to the top by predrilling holes and screwing the hardware in.

The results are very sturdy and functional!  I love it!

I also put together a quick video that you can watch of all the steps too -

And of course, the detailed plans are below (click read more if this is the homepage).  Hope all this information helps if you are building this project.

Share when you build - add #DIHWORKSHOP to your post so we can find it!

XO Ana


PS - Want to see lots of other modified version by other bloggers?  Go here!


Faux Oar or Paddles

$
0
0

Hi there!!!

Thank you so much for all the love on the dining benches I made for our cabin!

Who commented "bench smench .... those oars?" I had to chuckle at you because I kinda agree - the oars are where it's at!

Can you believe that after I built the oars - before they were finished - I almost threw them out?  They were not so pretty.  So not pretty that I had decided to scrap them and did not even bother taking a photo of them!

But after I stained them, using the same one step poly and stain I used on the benches,

Varathane Stain + Poly in Early American (can I also mention that this stuff cleans up with soap and water?!?) -

And then I found the perfect space for them, in this little area between the closet door and the corner of the room.  

I LOVE these paddles!  I had wanted to put some faux paddles on the wall, but didn't want something that looked new or too theme-ish - these handmade oars do the trick!

I used exactly one 1x2 (1$1.00) and one 1x3 ($1.50) - counting the little bit of glue and stain you'll need to, this project is so inexpensive too!

Some other ideas are to hang horizontal and add hooks, or even keep vertical and add key hooks.

I'm sharing a quick video here on how I made it -

And of course, the step by step plans are below (click Read More below if this is the homepage).

Always happy to hook you up!

Thanks so much!

XO Ana

Wall Shelf Organizer with Hooks and Mail Slot - Back2School 2015

$
0
0

Hi there!  

Back to school for us in just around the corner!  My daughter starts third grade in just under two weeks.  Can you believe she's this big already?

Just ask any parent of a school aged kid about the stuff that comes with going to school - the backpacks, lunch boxes, the folders, the library books, the homework.  The handouts and schedules and sports programs .... I've only got one in school right now, and am always looking for that paper, or that library book - I can't imagine having several kids in school and trying to keep track of all the stuff!

So this year, I thought I'd make a wall shelf just for back to school.  I wanted the project to be simple, with just the right amount of storage for school needs.  

So I came up with this -

It's just a little spot for a file folder or a libary book, and then hooks for back packs and lunch boxes.

This project was so fast and fun and easy.

I let my daughter pick her paint color (Serenity Blue by Chalked Rustoleum), and went with Charcoal by Chalked Rustoleum for my son's organizer.

The colors really made these projects fun!  I kinda wish I had more kids to make more of them in different colors.

This is a great beginner project!  If you want to try your hand at woodmaking (and most likely get addicted and furnish your whole house, just warning you!) this is a perfect project to start with!

Here's all the steps in the video -


Can't wait to see how yours comes out too!

XO Ana


PS - If you love this, please pin and share!

DIY Tie Rack Tutorial - Featuring Craftaholics Anonymous

$
0
0

I am in full on organization mode, knowing once school starts, life is going to be crazy. There will probably be less time to get organized, so I am taking the next couple of weeks before school starts to knock off some simple organization projects that take an hour each and putting them to work for me! Relate much?

This super tie rack caught my eye because of it's simplicity. NO, my husband is not a tie wearing man being in the construction trade, however, this could definetely be used for a plethora of other applications, right?

That peg board takes the guessing out, genius! I think this could work great for scarves, jewelry, bags, you get the jist. Craftaholics Anonymous has a great tutorial, so stop by and get a little more organized today!


Home Depot DIHWorkshop Pumpkin Treat Holder

$
0
0

I had such a fun time making these spooky and sweet pumpkins! I hope many of you were able to make it to your local store too!  For those of you who couldn't make it, I've got you covered with plans to follow!


Here's another variation!

Swing by Classy Clutter for the ghost candy stand tutorial!

Hope you all can have some fun with this one! Thanks for stopping by.


Sawhorse Leg Plywood Table Featuring The Merry Thought

$
0
0

Figuring out extra seating for holiday meals or large family gatherings can always be a little challenging to say the least. That's why when I saw this beautiful tablescape complete with DIY instructions for the table itself, it's nothing short of brilliant and the answer we've all been waiting for. "We" as in the few and the brave to "host" these gatherings!

Set up and take down, repeat for the next gathering, it's that simple!

Have fun with this one and amaze your friends with your enginuity, stop over at The Merry Thought for this and more!


Wreath Display Rail

DIY West Elm Inspired Stocking Holders

$
0
0
DIY West Elm Metal House Inspired Stocking Holder

These stocking holders were inspired by the West Elm "Metal House" stocking holder which featured only one style house. My collection includes four buildings. The construction is sooo easy! The buildings only require a few cuts and then they are simply screwed to the base. The metal look was achieved by first painting the holders black and then brushing with a metallic paint. This is a quick afternoon project!

Easy Scrap Wood Photo Display Gifts

$
0
0

Hello, happy weekend! 

Christmas is getting so close!  I don't normally post on Sundays as we try to keep the weekends for family time, but I wanted to make sure I got these last few plans to you before Christmas morning.  

This morning, my sister came over, and she showed me some ideas for gifts the kids can make for the grandparents.  Grandparents are hard to shop for, as ours already have everything they need.  My sister's idea was to do something so that the grandparents could display photos of their grandkids.  

So we went to the garage, dug through the scrap wood, and after a couple of hours of wood crafting, this is what we came up with!

Both of these gifts were under $5 to make (free if you have the scraps) and could be made in half an hour (it took us longer because were were designing as we built).  The grandparents haven't seen the gifts yet - pending they don't hop over and read the blog in the next couple of days, and I just know they are going to love them!

I mean, really, how can you not love that?!?!? 

This is way better than another sweater or kitchen appliance that doesn't work as advertised.  For the photo display block, we just took scrap 2x4s about 12" long, stained them using Rustoleum Golden Oak,

then drilled holes in the tops and poked wires in the holes.  We twisted the wire so it would hold a photo.  A large paperclip would do the same thing. 

For the text, we used Painter's Markers to personalize the wood blocks.

The wall display was super easy too.

It's just 1x2s and clothespins.  I cut the boards,


Then I used glue and my crown stapler (you can also use the brad nailer or screws) to attach the frame boards together.  The sides just overlap the back boards for a very simple joint.

Then we just used Krazy craft glue to attach the clothespins to the wood frame.

I can't wait to gift these!

All right, your turn!  The plans for the wall frame are below, but if you can't get these built in time for Christmas, make sure you pin for later!


Enjoy the rest of your weekend, I will see you tomorrow.

Happiest Holidays!

Ana


American Girl or 18" Doll Sofa or Couch Plans

$
0
0

Hi everyone, happy Monday!  Just a few days left before Christmas!

After I shared plans for this dollhouse, I promised you I'd get you those 18" or American Girl doll sofa plans to you before Christmas, didn't I?  I know we are cutting it close, but this project is SO simple, it's totally do-able!  I guess I should say DIY-able!


This doll sofa and doll chair are made of just 1x6 scrap boards with 1x2s underneath for support!  Seriously, so simple!

This living room set is perfect sized for my daughter's American Girl, and would work with most 18" dolls.

This set would make a wonderful gift, especially since you could personalize by painting different colors and using different fabrics for the cushions and pillows.

The set we made was free because we used scrap wood.  But if you were to purchase wood to make this doll sofa set - expect it to be under $10 in supplies!

I've got you covered with the free plans following.  If you build, please do share - it makes my day to see your projects!

And if you can't build now, make sure you pin to build later!

Have an awesome day!

XO Ana


Joy Holiday Sign Christmas Wall Art

$
0
0

It's Christmas Eve!

Are you ready? 

Christmas decorating has always been a great challenge for me, and sometimes my family teases me about being "the grinch" and there's always a story or two about how I've taken down the tree on Christmas Day, while there were still guests in the house. I love Christmas. But we have always had a very small home - going from 1000 square feet to 800, and in the dead of cold, long, dark winter in Alaska, with the kids trapped inside, it gets even smaller. I feel claustrophobic with just the toys not put away, or if there is a project going on on the dining room table.

So I always keep my Christmas decorating to a minimum, and only have it out for about a week. The other great challenge with Christmas decorating is we live 350 miles from a Target. There is some shopping about 100 miles away, but with a one year old having to ride four hours in a car seat, trips to "town" are rare, and so full of necessities like doctor appointments, business needs and grocery shopping that I rarely just get a chance to shop for things like clothing or home decor. This is the big reason why I do so much DIY.

This year, my Holiday mantle is true to who I am right now - simple and DIY.

We don't have a mantle, but this floating white shelf we made a little while back is perfect.  

In a small space, wall decorating is your best option.  A few fun holiday pillow covers bounce the Holiday spirit around the room, and is just the right amount of Christmas decorating for our small space.

It was the Joy sign that made everything come together for me this Holiday season.  It is of course DIY.

Here's how I made it -

For tools I used my Ryobi AirStrike Crown Stapler with 1" long staples.  A brad nailer or even screws or a hammer and nails would do the trick too.

Whenver you use nails or staples, make sure you use glue.

I had some leftover strips of 1/2" plywood that were 8" wide and about 40" long.  I simply glued and stapled to some 1x2s on the back.  If you don't have leftover plywood, anything from cedar fence pickets to new plywood ripped into strips 8" wide to a full plank of plywood would do the trick.  At this point, I was just using scraps to create an economical canvas for me to work on.

The plywood was reclaimed from some other project, and had this gray tint to it.  A gray wash paint treatment or gray stain would give you a similar look on new plywood.

I used a 1x2 to create my J and Y letters, leaving a 1x2s width around the outside, and then the letters themselves are 1x2 width wide.  The I just painted inside the letters with white paint.  

Then I just added a nail and hung a wreath on the nail (wreath is from Home Depot). My little niece helped out and was quite proud of the finished project too.

I love it, and hope you do too!

Want more Holiday Mantel inspiration?

Jen Woodhouse hosted an amazing blogger mantel tour this year - check out all the mantels below!

I'm so proud and humbled to be a part of this blog tour this year.  Aren't they all just beautiful and inspiring?

Well, like you, today is going to be a busy one, with last minute gifts to wrap and a family Christmas party, so I better get to it.  

Happy Holidays!

Ana


PS - Don't forget to pin this wood Joy sign for next year!


DIY Plywood Counter Top for the Laundry Room - Featuring Vintage Revivals

$
0
0

Finally a space to fold the laundry. A simple "waterfall" plywood counter top really pulls this laundry area together! Would you believe is for about $90 when all said and done. 

An the copper hanging bar..... Since when does a laundry room look this FRESH? Looks like I have some work to do, luckily the DIY tutorial is quite handy, just swing in to Vintage Revivals for this simple upgrade and much more!


DIY Scooter and Bike Rack Featuring Her Tool Belt

$
0
0

Today we are sharing a super sweet DIY Scooter and Bike Rack by Her Toolbelt! Ah to be organized right down to the kids bikes and scooters, it IS an attainable goal. That's great news!

With some simple 2x4's and 2x2's it's a easy, quick and cheap build. I just love those kinds of projects that you can actually put to use in no time at all! This simple scooter and bike rack is one of those. Now to train the kids to park in their designated zone.......


Swing over to Her Toolbelt for this plan and more!

American Girl or 18" Doll Fridge Wood Building Plans

$
0
0

Thank you everyone who follows me on Instagram!  It's fun to be able to share quick glimpses of what I'm up to, or what I'm finding inspiring.  It's been a great tool for me to connect with you.

One of you asked on Instagram if I had posted the doll fridge yet, sized for the American Girl dolls, or 18" dolls.  Thanks for reminding me that I had not gotten around to doing that yet for you.  I appreciate your paitience with me, and am happy to share those plans with you today!

We love how cute and simple this fridge is!  I spray painted random hardware gold and used up scrap wood, so was able to make the entire kitchen for free!  Don't ever throw good hardware out.

The plans for the fridge follow (if this is the homepage you'll need to click READ MORE below) and you can also find plans for everything else too!

Enjoy the plans, and if you do build, please take a second to brag, we'd love to see how your projects turn out too!

Have a great day!

Ana


Outdoor Acrylic Easel

Clothespin Fabric Storage Rails

$
0
0

One of the very first projects I every shared through blogging was these clip art rails that I made for my daughter's room so many years ago -

They were such an easy, inexpensive project, that transformed a blank wall into something useful and so easy to decorate and change up.  I always loved how they turned out and was forever a fan of clothepins after this project.

So when it came time to find a way to store Grandma's bins and bins of fabric scraps, I knew just what to do to not only store the fabric, but keep it within easy reach, all while adding color and inspiration to the space.

This is certainly better than a blank white wall.

And certainly better than digging through piles of fabric, for one tiny piece.

How to Make

It is very easy to make these fabric storage clip rails.  Just glue full size clothespins with a craft glue every 3" to pine 1x2 boards (I used furring strips, they are less than $1 each up here in Alaska).  Then locate your studs in the wall, mark, and screw the 1x2 furring strip to the wall with screws 2" in length or longer (depending on wall composition).  So easy!

Can't wait to see how your's come out!

XO Ana


Viewing all 2631 articles
Browse latest View live


Latest Images