Quantcast
Channel: Starter Projects

Beginner Farm Table Benches (2 Tools + $20 in Lumber)

$
0
0

Thank you for all the positive feedback on the Beginner Farm Table plans I posted earlier this week!

We love being able to get back to basics, and make woodworking as accessible to as many people as possible, with as few tools as possible.

As promised, you'll find the bench plans following.

The bench plans are just as beginner friendly. And of course, they are sturdy and perfectly sized for the dining table.

We used the same building techniques as the dining table, just screw this bench together -

And the same easy one step finish, Watco Danish Oil in Light Walnut.

And you can watch the video build tutorial too -

Enjoy, do share if you build, we love seeing your finished projects!

Have a great weekend,

Ana


Beginner Farm Table (2 Tools + $50 Lumber)

$
0
0

I have been a long time user and fan of Rustoleum products.  This post is sponsored by Rustoleum by all opinions expressed are my own.

UPDATE: Bench plans have been posted here.

UPDATE 2: We added a tinted poly coat to the table and it now looks like this!


I've been wanting to get the beginner crowd a VERY simple, inexpensive farm table plan for years now.  Just because you aren't an expert woodworker with a zillion tools doesn't mean you can't still start somewhere, right?

Well, I finally got my chance!

We are moving into the new house, but with so many, many functional projects to tackle (like closets and pantry cabinets), a beautiful dining table is way down on the priority list.  But still, I insisited we need a dining table to move in.  Once you give in to the kids eating on the couch, you're done ... or at the very least have to be the bad guy and retrain the family.  

So I gave myself three criteria for a new somewhat temporary dining table -

  • Must cost less than $50 in lumber
  • Must be done in an afternoon
  • Can only use 2 tools - a drill and a saw (since most beginners don't have a Kreg Jig yet - and I do stress yet) 

This is what I came up with -

And here's how it went down -

I purchased 6 - 2x4s and 6 - 2x6s in stud length.

The 2x6s are for the tabletop boards, and since they are all precut exactly the same at stud length, I set them aside - no cutting required.  My table will be 92-5/8" (standard stud length) long.

There's only 12 cuts on the entire table, and it's all the 2x4s.

I used a compound miter saw.  You can use a circular saw or jigsaw, but do make sure your cuts are very good and straight.

Cutting done, time to build!

For attaching, I'm using 2-3/4" self tapping screws.  You'll need about 100.  Bonus - these are exterior screws, so I could use my table outdoors too.

Alrighty ... let's build already!

I used scrap pieces of 1x boards to elevate the horizontal boards on the legs.  Then I just screwed from the outside.

Two leg sets done!

Then I flipped everything over and added the side aprons.  One trick is I will screw at an angle (kinda like a pocket hole screw) in opposite directions, so if the table is wobbled at all, the screws dig in from opposite directions. 

Then I flipped everything back over and checked for square.

Way out - like over an inch.

So I pushed the two shorter diagonal corners together until the two diagonals matched.

Then I added the bottom stretcher.  The ends overhang 3/4" - be careful that your legs are square when you add the stretcher.

The middle support piece keeps the aprons from spreading, and also give you something to attach the tabletop boards too.

Now for the top - I like to start in the middle and work outward.  So I find the middle on both ends,

And then I attached the 2x6 studs to the top with screws.  I am careful about screw placement so it looks good in the end.

NOTE: Since we aren't joining tabletop boards together edge to edge, there may be a small gap between boards.  You can fill with silicone after final finish, or use a Kreg Jig to build your tabletop first, then attach.

I was going for a rustic real wood look, but decided to sand to take splinters and rough patches out.  I started with an 80 grit and finished with a 120 grit.

Table is ready for a finish!

I love Watco Danish Oil because it is a beautiful, durable finish that is easy to apply - so much I wrote an entire post about it!  

Danish Oil is a color and finish in one, so all you need is one coat!  You can go back and further seal the table (or just the tabletop) if you so desire.

Gotta say, I do love how this one turned out!

You can also watch the video tutorial here -

If you likey, do let me know, and I'll get you those bench plans too! UPDATE: Bench plans have been posted here.

The plans follow, if you do build, please share, it's a great joy seeing your projects too.

Have a good one!

Ana


Farmhouse Bench

Ten Dollar Ledges

$
0
0

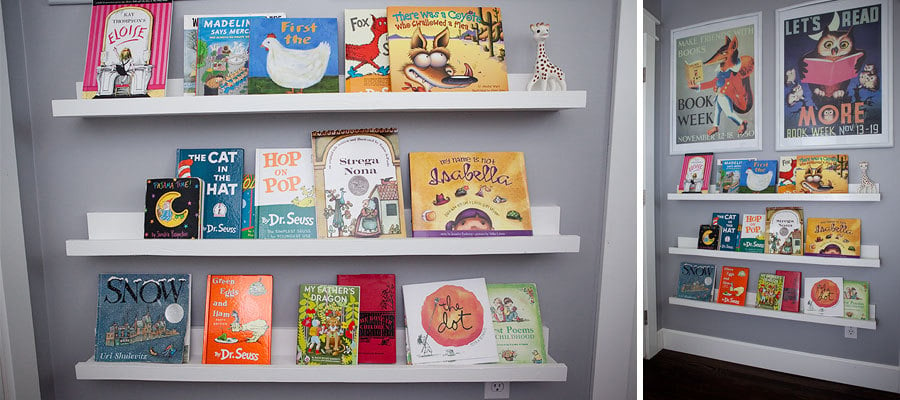
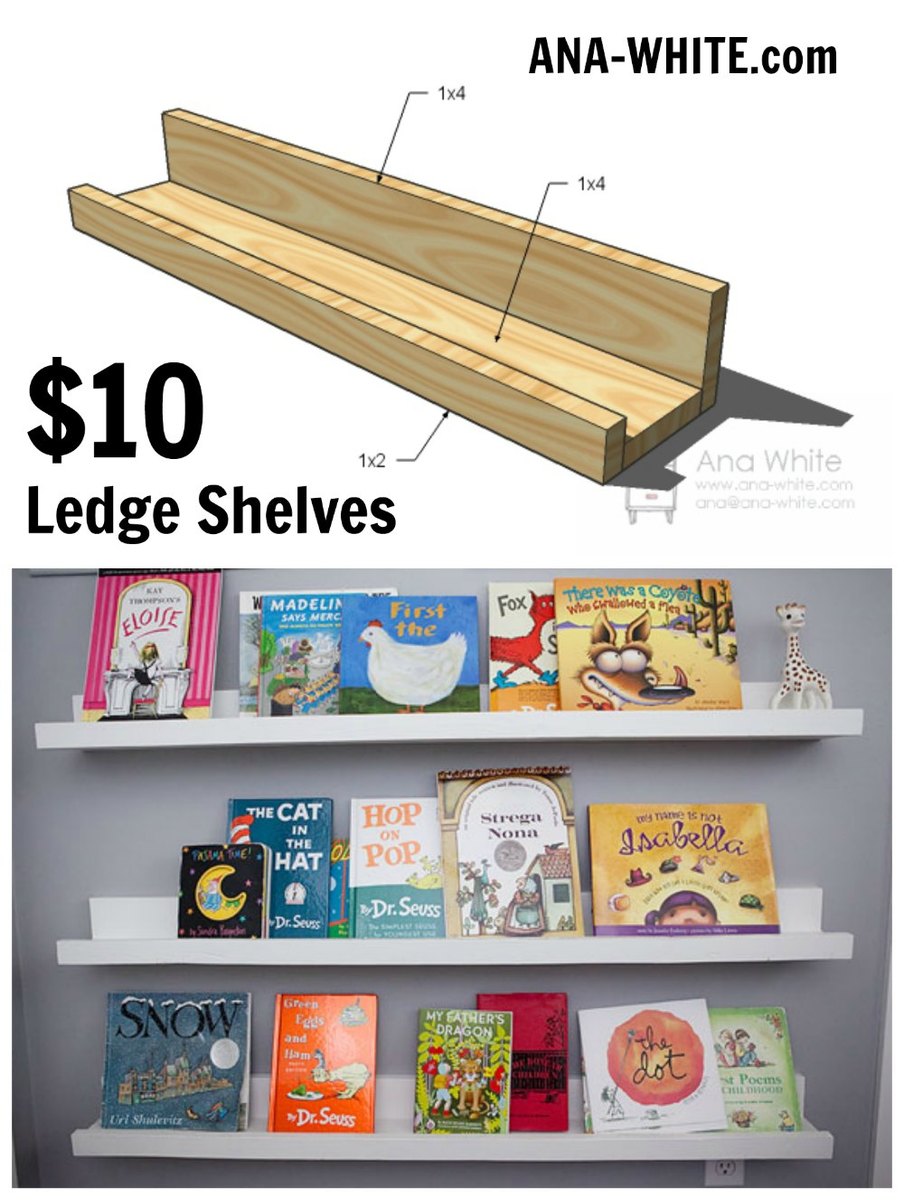
Need an inexpensive and beautiful way to display books, photos, decor or more on your walls?  The famous $10 ledge shelves are easy to build, can be built in any length, and are easy to hang! 

All you'll need is some off the shelf pine boards, your choice of screws/nails/pocket holes and paint or stain.  You can even build these without cutting a single board!

I love that you can change out your objects on display with ease too!

Here's a few reader projects from these plans to inspire you -

Book ledges by Crisaphi

Reading nook by karahart

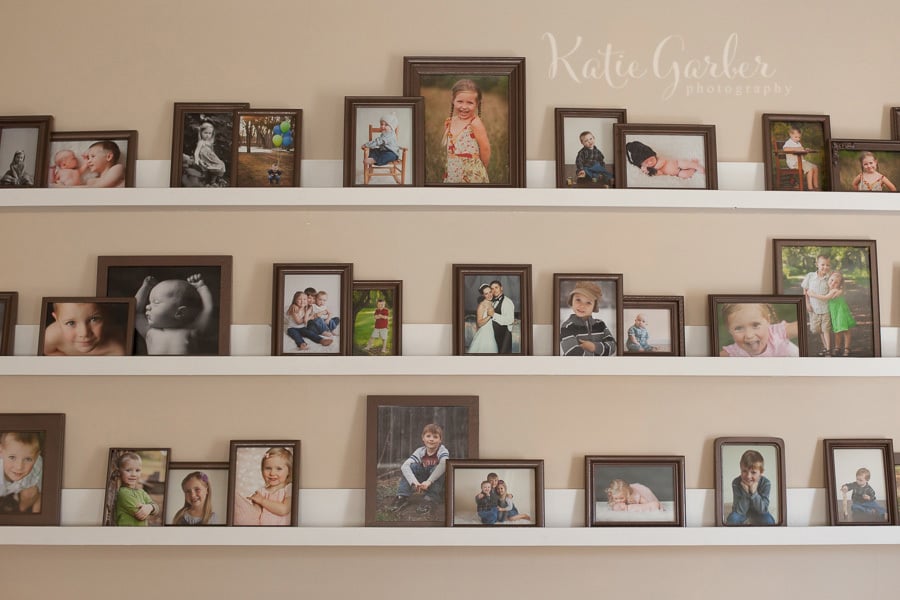
Gallery wall by Katie Garber

Rustic Stain by a.stauff

Corner Ledge Shelf - source unknown


The free plans follow! Enjoy!

XO Ana

A few weeks back, I was so delighted to be invited to a local MOPS group to help other moms build ledge shelves.  And I had so much fun with the simple design, I came home and transformed the blank wall in my dining room.

Creating a gallery wall was something I had always wanted to do.  But the cost was quite scary.  The ledges alone would run at $330 from Pottery Barn, and then of course, all the frames - and then getting your frames to look just so. Intimidating.

But when I discovered I could build the ledges for around $30 (that's why these are called the ten dollar ledges, they cost $10 bucks each for 8 foot long ledges), I found the courage to just try.

So I gathered up all the mismatched frames in the house and gave them a spray coat of white.  One coat to go.

And then just started arranging frames.  What do you think of my $30 gallery wall?  Needs photos, eh?  Yeah, that's the next step. And the hardest step!

Kids Kit Project: $2 Birdhouse

$
0
0

I just heard birds chirping outside!!!

Spring is definitely here, even if it is April and we still have a couple of feet of snow outside.  And the birds are coming back, looking for summer homes.

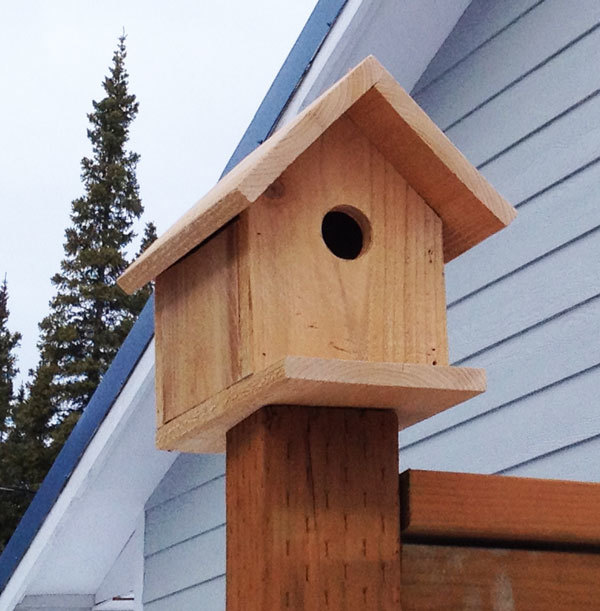
This week, I'm going to share with you a collection of birdhouse plans that you can make from cedar fence pickets.  Costing less than $2 each (even up here in Alaska) and naturally weather resistant, cedar fence pickets are the perfect building material for little birdhouses.

This birdhouse is so easy, your little ones can make it.  I suggest kiddos putting it together with glue (try a glue that works on oily wood like Gorilla Glue or a super glue for fast dry times) and then Mom or Dad adding some nails or screws after the glue dries to make sure the birdhouse is plenty sturdy.

$10 Cedar Tiered Flower Planter or Herb Garden

$
0
0

Hey DIY Friends!  I have a special treat for you today!!!

We are sharing plans for a tiered planter, that we only spent $10 on!  

And it gets even better!!!

Remember I said we?  

Well, this planter was actually built by my good friend Jen.  Jen considers herself a beginner builder, and she built this tiered planter in one hour from a new plan we worked on together (plans are following).

Jen's going to be working with me on simple, small projects from my designs - like this one - so I'll let her take it from here!

------

Hi, I'm new to this so bear with me. My name is Jen and I am a mother of 3. I am the type of person that knows what I like when I see it, not so much a creator of something new. So when I started working for Ana I found myself online looking at all of these wonderful creations from others.

I asked Ana if I could help her more and get into the building process. She is a great sport and of course said yes! I was excited to get to work, so she told me to come over and she'd come up with a simple plan for me to start.

This planter is as easy as it gets! I got to work on it and in an hour I was looking at something I built! Such satisfaction and for $10 just plain exciting! The first box went together great, then I was cruising, the second box I ended up attaching the boards wrong, so attention to detail is important. I didn't worry too much because I wasn't out much and it was a reminder that I needed to slow down and chill out a little bit!

The spacer came in handy to help keep the boxes evenly spaced and I didn't have an extra hand, just another step to simplify the process.

Gotta say I love this Staple Gun. Once I made the supports flush to the top I shot them in and viola, I had the stand attached!

Then I flipped this baby over and stood back to admire and couldn't believe how something so simple could make me so happy!

Be sure to drill holes in the bottom to allow drainage.

Time to get this baby planted, all hands on deck kiddos. They were so happy to help!

We decided to keep the cedar natural so the step that usually takes the most time, the finishing, didn't even need to happen. The final result is a beautiful planter that is so versatile. I thought herbs would be nice, or instead of 2 traditional planters on each side of the sidewalk, two of these would be fun and give a different look. If you do decide to finish it, paint or stain goes a long way. A simple project with many options, that's what I'm talking about!

I gotta say this is the most fun I've had in a long time! Can't wait to see what's next!

Sturdy Work Bench

Doll Farmhouse Bed

$
0
0

The Ram called from work yesterday and the conversation went something like this:

"I can barely hear you." (Ram)

"Oh, I'm out in the garage." (Me)

"Are you building something?" (Ram)

"uh, yeah . . . me and Grace just built a Farmhouse Bed." (Me)

slight pause . . . "who is the bed for?" (Ram)

How we got to the point where building a bed is no longer a big deal, I'm not quite sure.  But the Ram was quite relieved when he came home and found out who the bed was for.

Grace's doll . . . that she might get for Christmas.

And then the Ram looked over my shoulder and chuckled . . . Hey!  That looks just like our bed!

But best of all, Grace (it's not a surprise when she helps build it) absolutely loves the bed.  Grace has never had much interest in toys, so we were quite surprised to see her making the bed, putting her dolls to bed, even trying to sleep in the bed herself.  She also helped me make all the bedding from the adorable vintage fabric that I found at a local fabric store. We just bought a little bundle of precut squares and sewed it all together - not perfect, but it was something that Grace and I could do together and appreciate.

I'm really enjoying my daughter being old enough to help and have an interest in crafts.  I hope you make this bed for your daughters for the Holidays.  But most of all, I hope you make the bed together - the memories and knowing what and how something is made is more valueable than the end result.  She'll outgrow the bed, but she will not forget the experience.

The main motivation for building this bed was from the frequent request from moms everywhere.  We all want the best for our children.  But also, the pile of scrap boards sitting on my saw stand just kept nagging at me . . . make me into a doll bed!


Simple Potting Bench

Farmhouse X Desk

Wood Crate Building Guide

$
0
0

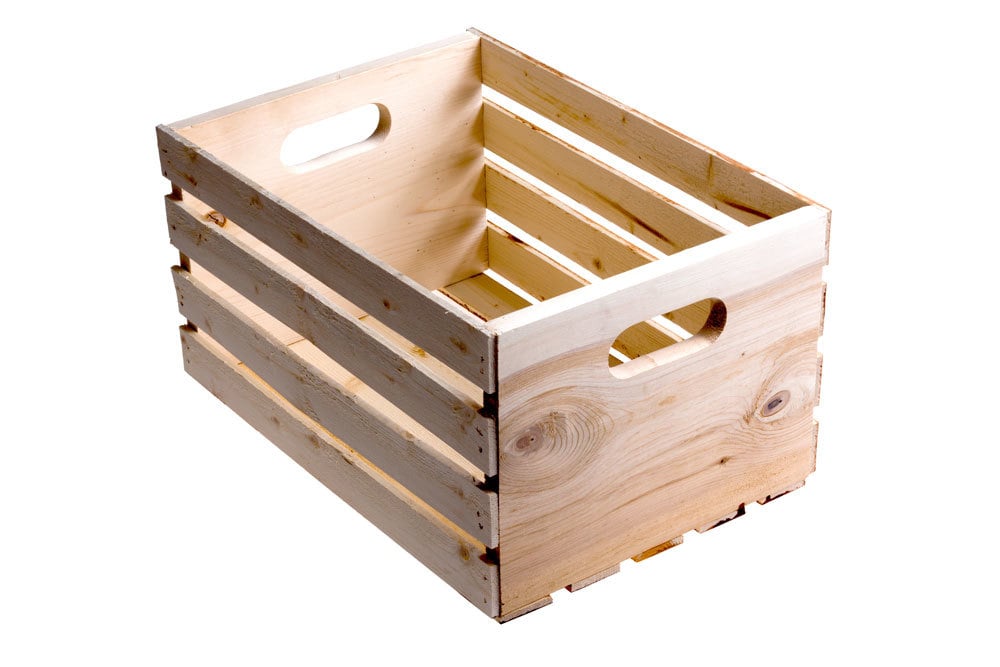
Wood crates are so versatile, beautiful and useful!  You may have the scrap wood lying around already to build your own in minutes for free. And let's not forget if you build your own wood crates, you can make them any size you wish!  

So I thought I'd put together my Ultimate Guide to Wood Crate Building for you.


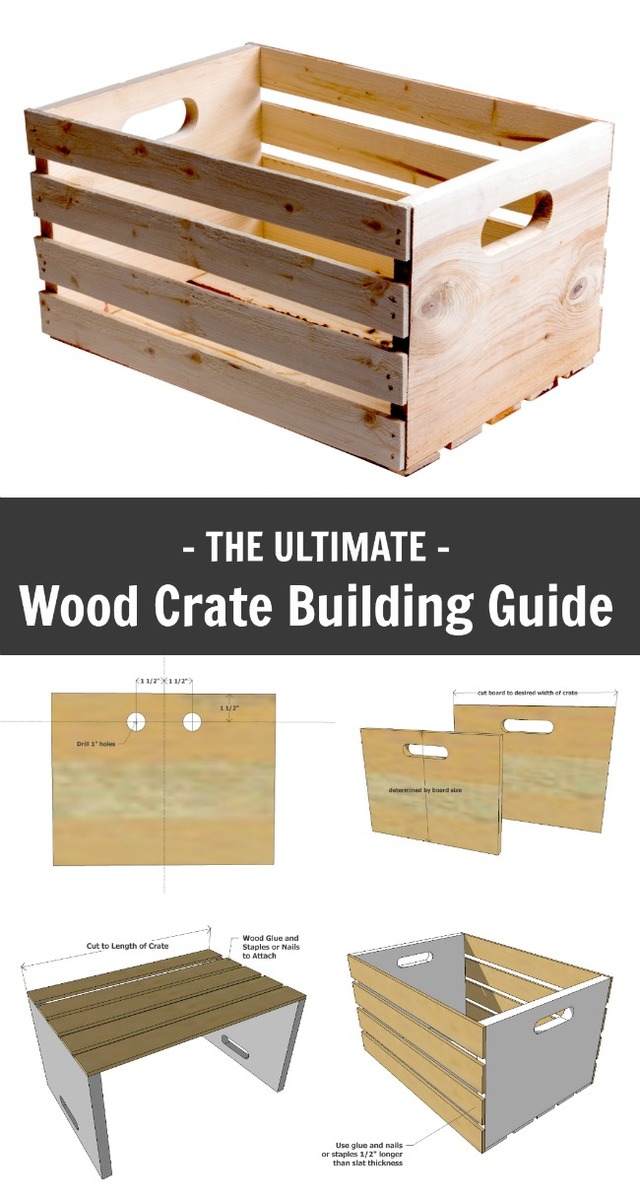
The Ultimate Guide to Wood Crate Building

Wood Crate Parts

Most wood crates are made up of two parts, the Ends and the Slats.

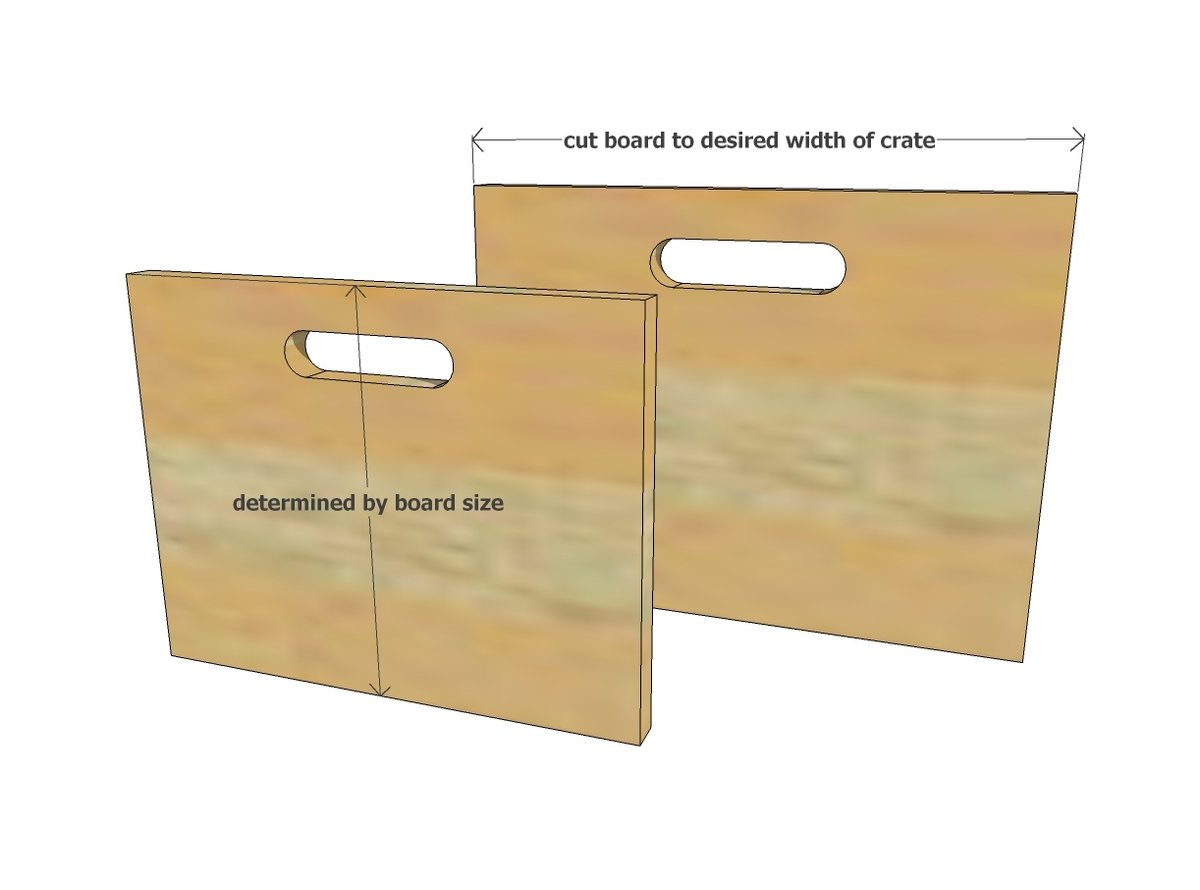
The ends are structural, and are made of a 3/4" thick piece of wood.  This provides enough width to attach slats to the edges of the end pieces.


End Boards Determine Height of Wood Crate

Economical pine or whitewood is readily availabe off the shelf in standard sizes.  Choosing a wider width board will result in a taller crate.  

  • 1x12 will result in about a 12" tall crate
  • 1x10 will result in about a 10" tall crate
  • 1x8 will result in about a 8" tall crate
  • 1x6 will result in about a 6" tall crate
  • 1x4 will result in about a 4" tall crate

*Crate finished height will be determined by the material used on the bottom, so may vary up to 3/4" from above.

Other material like 3/4" plywood can be used for ends, but will require more cutting and an exposed plywood edge will be visible.


Cut End Boards to Desired Width of Wood Crate

Once you have selected the board to use for the ends, simply cut to how wide you want the wood crate to be.  

Cuts can be made using a jigsaw, circular saw, or any mitersaw or chop saw. 


Slats

The slats for the wood crate can be a variety of different materials.  The width of the slats can vary, from 1-1/2" wide slats to a complete covered bottom and sides.

  • Basswood or Balsa Wood, sometimes referred to as "hobby wood" is available in most hobby stores.  It is in standard widths perfect for slats, and is lightweight and strong enough for a crate bottom.  You may even find hobby wood in precut lengths perfect for wood crates.
  • Plywood scrap pieces can be ripped on a tablesaw down to the desired slat width and used as slats.  1/4" up to 1/2" is most desireable.
  • For heavy duty wood crates, simply use 1x3 wood boards as the slats.  The crates will be bulkier and heavier, but also stronger and more durable.

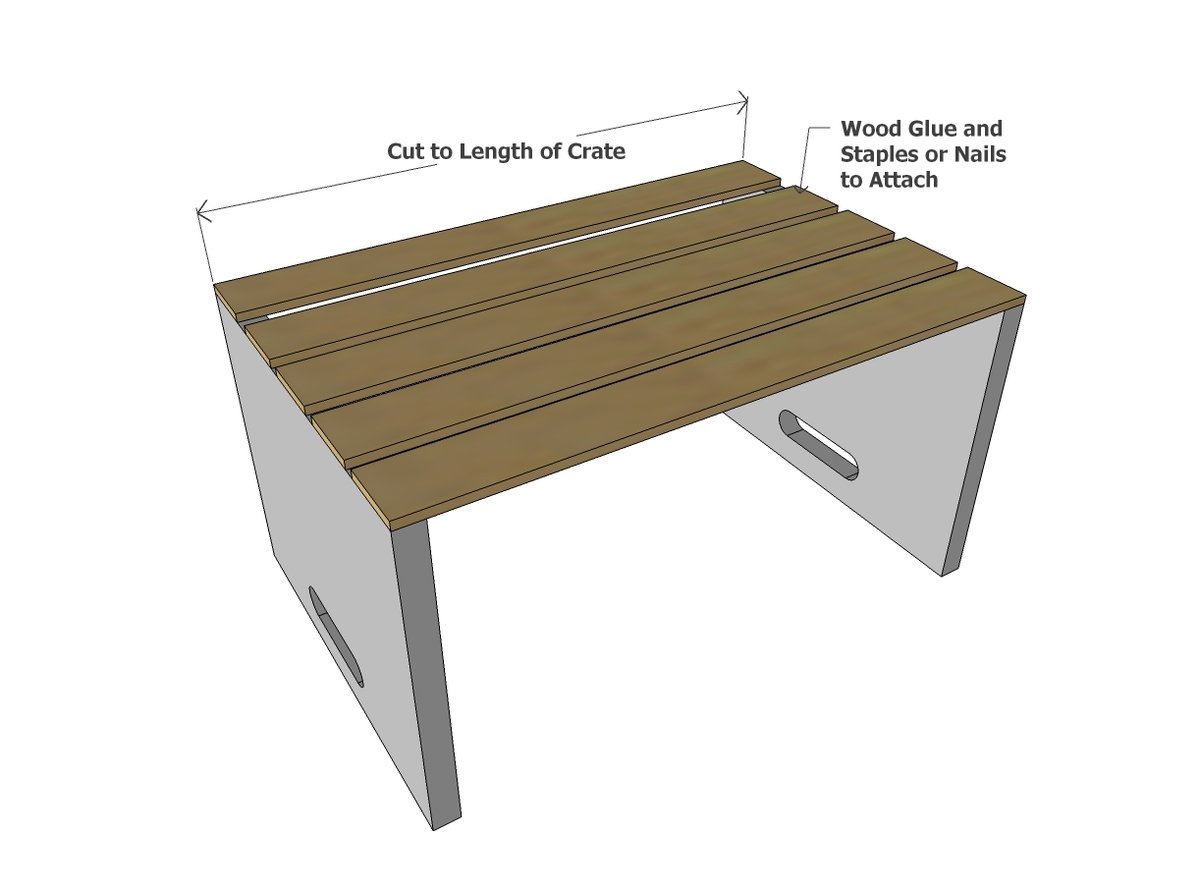
Cut the slats to the desired length of the crate.

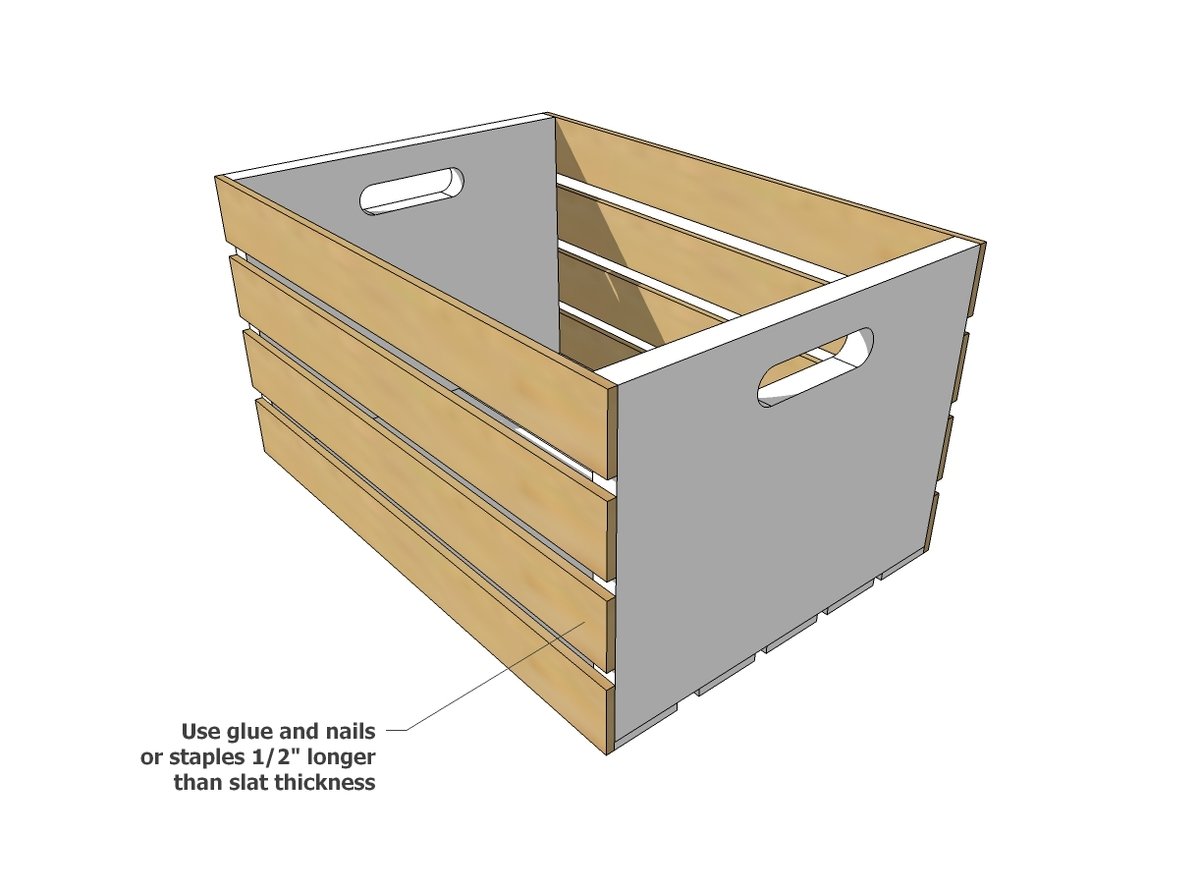
Begin on the bottom of the wood crate, and attach slats to bottoms of end pieces with glue and nails at least 1/2" longer than your slat thickness.  For example, 1/4" plywood would require a 3/4" nail or staple, but a longer nail or staple would be fine too.  NOTE: Avoid exessively long nails as they are more expensive and may overshoot on the sides.

After the bottom is attached, repeat steps to attach side slats to sides.  I like to attach the top and bottom first, and then fill in the center slats, eyeballing the gaps in between.


Handles

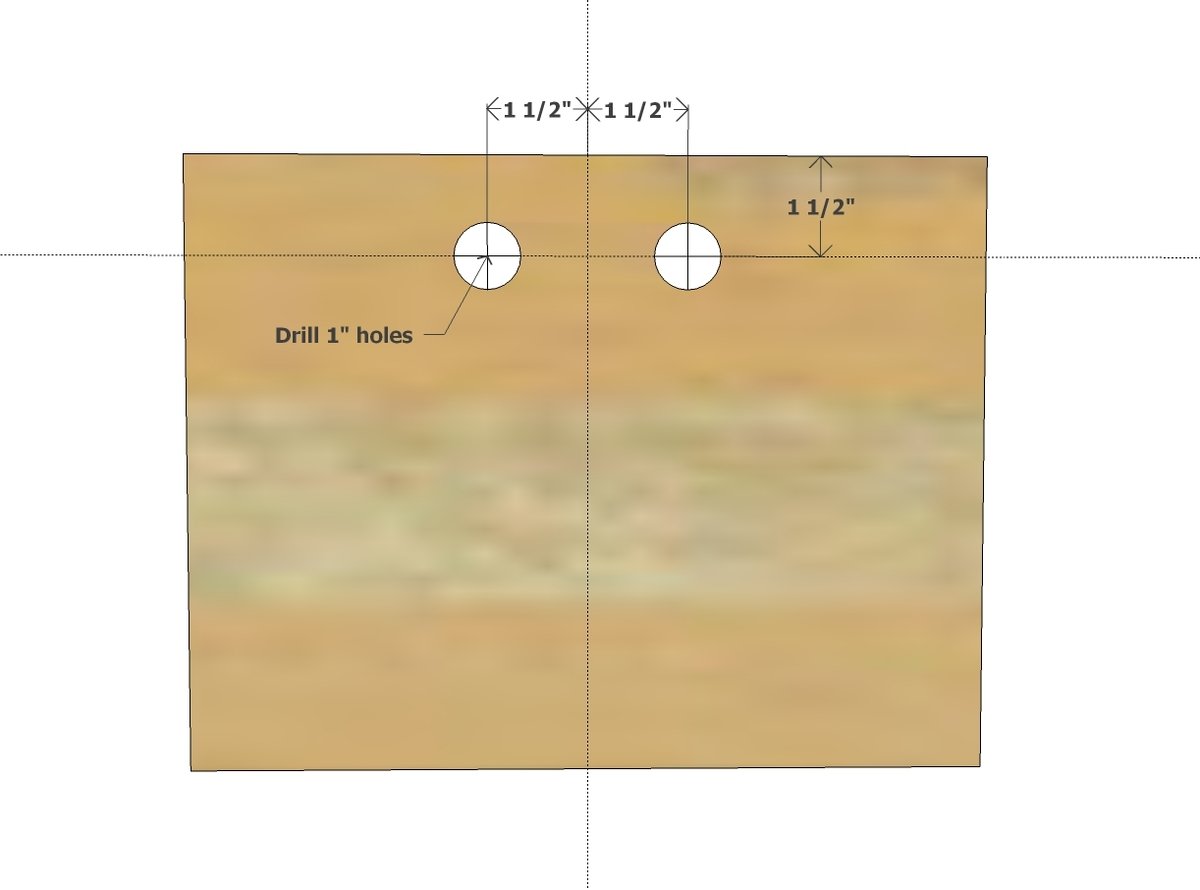
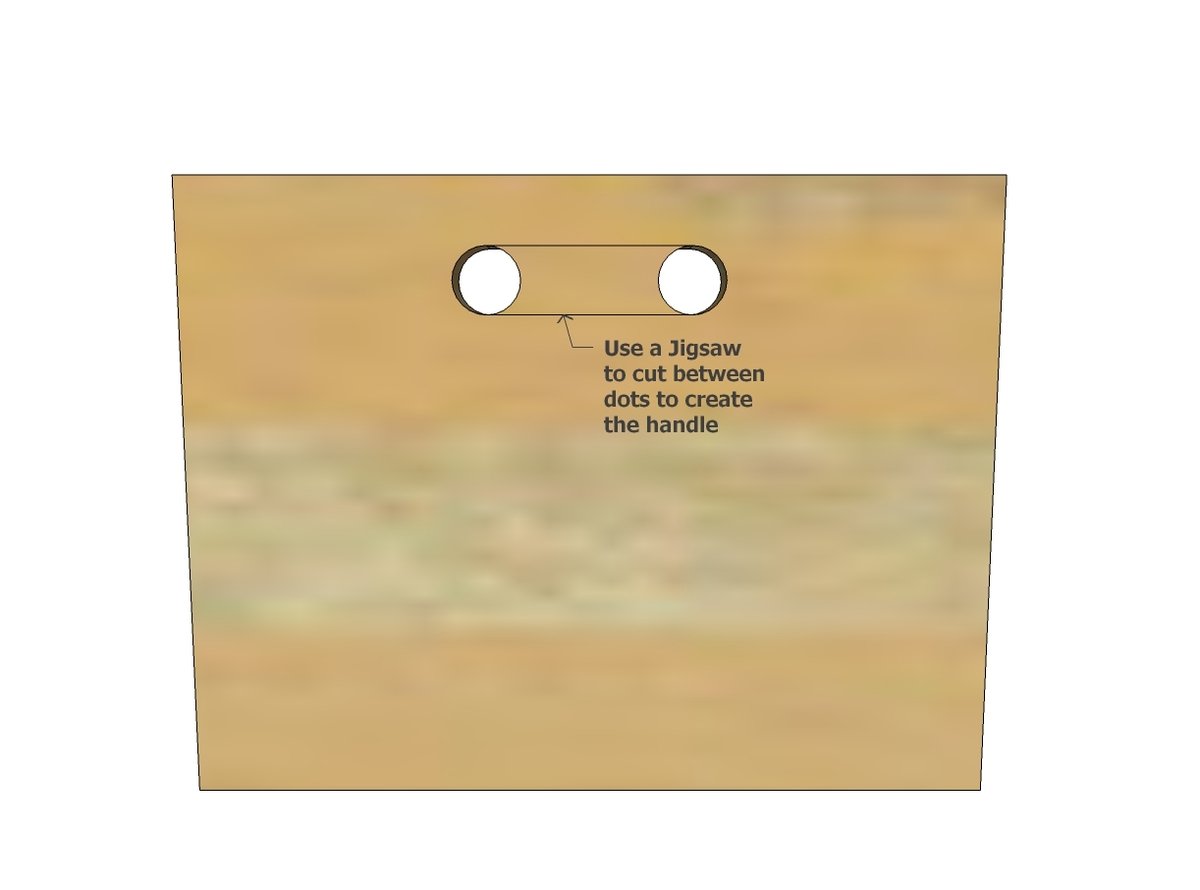
Optional handles can be added to the ends.  The most economical and easiest way to do this is by drilling two 1" holes on the ends, about 1-1/2" down from top of ends.

Simply mark the center of the end vertically, and draw a second line down 1-1/2" from the top.  Measure off the center 1-1/2" and drill holes with a 1" drill bit.


Dividers

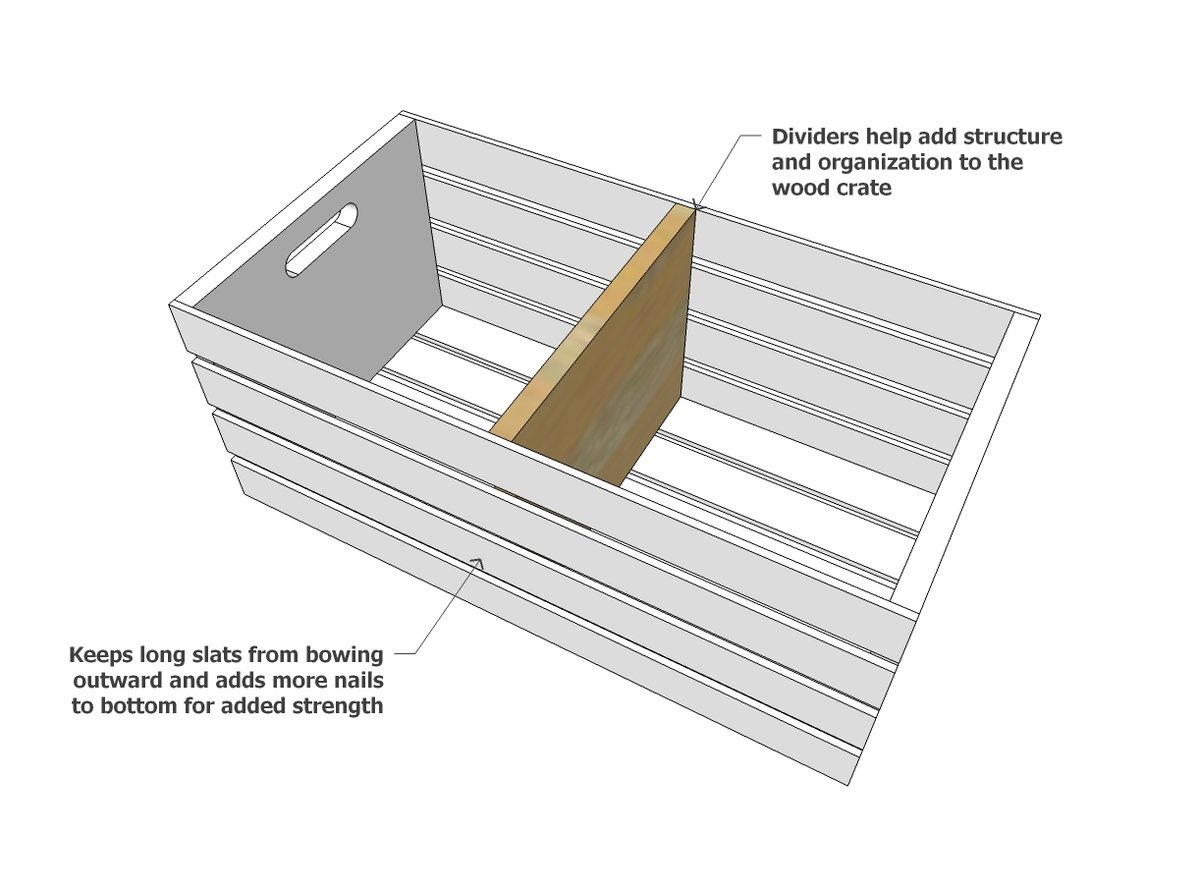
Dividers can add funtion to a wood crate and structure and strength.

For especially long slat runs, consider dividers.  It will help organize the contents of the wood crate, and benefit the structure of the wood crate.

Take a second to pin this tutorial if you aren't ready to build right now.

If you do build, please brag and share - it's a big deal seeing your projects.

#BuildShareRepeat

XO Ana

Updated Tryde Coffee Table - Pocket Holes

$
0
0

Last Thursday we had our Third Birthday!

I've been so exhausted from the flu and catching up on emails and the blog, I didn't even know!

We have a lot to celebrate over the last year!  As far as blogging years go, this one has got to be my most favorite. This past year, we embraced many of you as contributors to the blog, bringing different styles and personalities to our DIY furniture.  I've made so many new friends and learned so much as a result, and love the stories you bring to our DIY furniture.

This past year, we transformed the Momplex from an empty shell into what is sure looking like a cozy home for Mom!  It's been a big task, and your support has helped us push through hard times.  Thank you so much for being there for us!

And of course our first book came out!  Thank you for your support and encouragement!  

What a great year it was indeed.

So what's next?

Here's what we are hoping to focus on this coming year:

1. More DIY plans.  I want to add a ton more plans in the coming year providing more selection and options for you.

2. Better support.  If there is anything that keeps me up at night and makes me sad, it's my inbox.  I am so sorry if I could not answer your email.  It's my goal in this coming year to bring on an assistant to help me and provide better support to you.

3. More Video.  Some of you are visual learners.  I will work very hard to get a comprehensive How-To video library up this year.

4. Finishing the Momplex.  We are reaching the most exciting part of the Mompex, the inside!  I heard the D-Word (drywall!) and we can't wait to furnish the Momplex with DIY furniture!

5. Sharing More.  Did you know the week before we went on book tour, we were out harvesting moose in hurricane force winds for our winter food supply?  That I cook a grain-free diet to keep my family healthy and happy?  DIY encompasses so much more than furniture in our home, and we see tremendous value from our DIY lifestyle. 

And the Ram keeps pestering me about how quiet the house seems now that Gracie is in school ... we'll see ....

And in between all these goals for the coming year, I'd like to go back and update a few of the most favorite plans on the blog.  Over the years, I've learned so much and it's only fair that some of our best plans be improved as well.

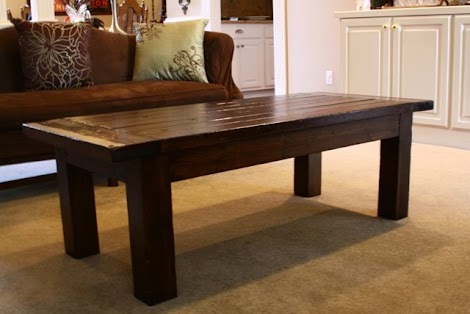
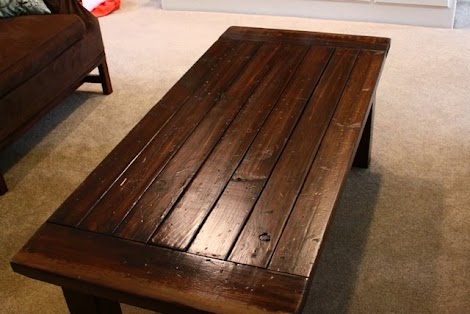
One of the all time favorite plans is the Tryde Coffee Table.

This one was built by Jeff from A Touch of Arkansas.

I designed the original plan before I used a Pocket Hole Jig.  The plans as they are are totally fine.  But if you use a Pocket Hole Jig, you can buy less lumber, use less screws, build faster and easier, and hide every single screw hole.  

Cheaper, faster and easier?  Uh, yes!  

So here's the first of a few plans I want to update - the Tryde Coffee Table built with Pocket Holes.

Enjoy!

PS - Been thinking of you folks on the East Coast.  Stay warm and safe!

Easiest Industrial Cart

$
0
0

Hi everyone, Jen here today!

This is a fun simple project with big impact! I love the mix of wood and metal.

Oh did I mention it only took 2 hours from start to finish, one board, one stick of “angle aluminum” and some screws!

Well, it actually goes finish first on this one!  The first step was to cut down my 2 x 12 into 3 pieces at 31 1/2” (so I could get three shelves out of one 8 foot long board). I gave them a good sanding and stained them.

I used Carrington by RustOleum - it's got a slight reddish tint, very pretty!

Now for the aluminum angle.  You can find it at most any hardware store, and it's pretty inexpensive -

Aluminum angle comes in precut sizes, but mine were 48" in length, so I decided to cut them in half.  

The best way I've found to cut aluminum angle is with a jigsaw with a metal blade.

Just clamp the aluminum angle down,

And it cuts like butter!

Even easier than cutting wood!

Then it was time add the aluminum angle to the boards.

 I set my 3 boards on their side on a couple sawhorses, set the first aluminum piece flush with the top and bottom board. 

Then I predrilled through just the aluminum where I wanted to place my self tapping screws, 

One on each side of the angle piece. 

I did the top board first and then the bottom.  I measured and marked the middle of the angle piece and set the center of the middle 2 x 12 board and did the same, predrilled and sunk my self tapping screws.

I did the same for all four sides. Almost done.

Then I just needed to add these sweet casters! I used 1 1/4” self tapping screws here.

I flipped it up and stood back to admire. 

AMAZING! It's really is amazing what 2 hours and few materials can make! 

Would look amazing in the kitchen as a baking cart,

Or if your kiddos are heading back to school, a great place to store art and school supplies that will easily wheel into a closet or bedroom.

Now it's your turn, just do it!

Adirondack Stool or End Table

$
0
0

These days, it's not uncommon for me to wonder if perhaps we've taken on too much this summer. You know we are building our mothers a Duplex dubbed the Momplex, while writing a book due out next year, and doing my best to keep up with my dear blog as well.  I am so grateful to have these opportunities, but sometimes we just get so busy, I can't step back and appreciate it.

So I really needed this day.
This day of realizing how big our daughter is, who has grown up so much on this blog.  So many of you have consoled me as a parent, offered advice, told me to let the hair brushing thing go.  Thank you for being there.  Parenting is much more enjoyable when you are okay with "good enough" and I'm wiser from your friendship.
Can you believe our little Gracie can hit a ball, ride a bike with no training wheels, use a measuring tape, and make herself breakfast?  How time flies!
But this day was about letting kids be kids, remembering the enchantment of seeing fish under the dock.
Finding frogs
And not getting too upset when your littlest girl cousin smashes it.
Once, we asked Grace why she loved camping so much.  And she said quite simply, "Marshmellows." Children really do have their priorities right.  
Then the jokes started.  Isn't he cute?  This is Grace's cousin Braden.
He REALLY knows how to make the laddies laugh.
What a day.  While the kids played, I took photos for the book.  Because for me, it's not just about the furniture.  It's about how the furniture improves the lifestyle of our families and friends. 
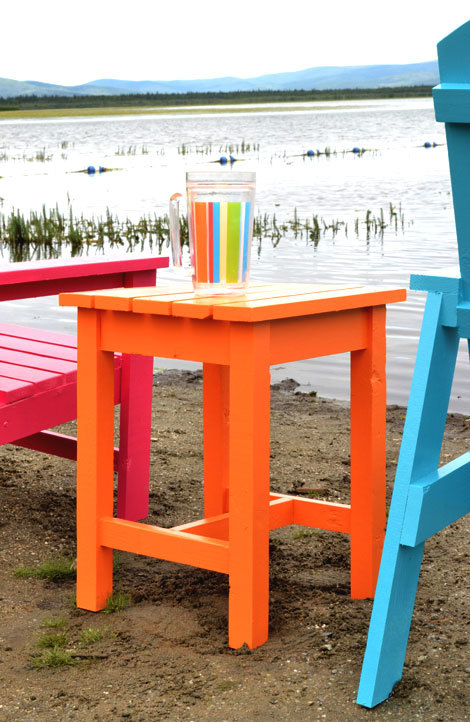
I can't show you all the photos - I'm really hoping for a book tour so I can meet everyone in person! - but I brought along some pieces that won't be in the book to help fill the photos.  And this end table is one of them.  It actually is stool height and sturdy, so could be used as a stool too.  
Hope the work that you are doing is impacting your family as positively it is mine!

Simple Cedar Wooden Toy Box

$
0
0

Have you had a chance to check out Pine+Main yet?  We are so excited about each and every new maker signing up, thank you for those of you who have already set up shop.  We've got big plans for Pine+Main.

A few of you have voiced that you would like to start selling your handcrafted furniture, but don't feel like you are at the level yet.  It's refreshing to know such honest and conscientious people.  

But we all had to start somewhere, on some project.  My best advice is to take on a simpler project, that you can make with less time invested in materials and tools, and sell it for a very reasonable price. So everyone is happy!

This is a cedar wooden toy box. It is huge.  And beautiful. And very sturdy - my kids are towing each other around in it.

But it cost me about $20 to make, in about 20 minutes.  If you are newer to building, it may take you a little bit longer.  

For my toy box, I used cedar fence pickets (about $2 each) and dry brushed Rustoleum Chalked in Linen White over it

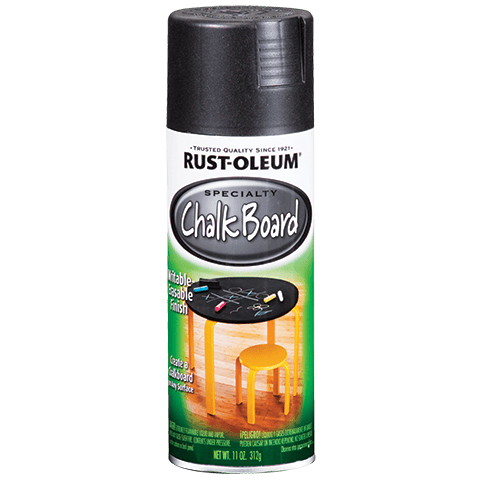
For the chalkboard, I simply spray painted a scrap piece of 1/4" plywood with Rustoleum Chalkboard spray paint.

I love how ours turned out, but wanted to share a few more ideas -

I love this custom painted toy chest with upholstered top and green casters.  $325 on Etsy.

Or add a lid and beautiful painted finish - $315 on Etsy.

Or size down, made with pine, to fit files for office storage - $225 on Etsy


I've long been a fan of Steve Ramsay on YouTube, and we've wanted to collaborate for years now.  So Steve has challenged me to create a monthly video on Home and Garden for Mere Mortals about simple projects that people can make to start selling their work.  Check out this month's video -


And of course, the free plans to build this wooden toy box (whether you make it for yourself, your family, or for selling) is below.

Enjoy and please do share if you build, we'd love to see how your wooden toy box turns out too!

XO Ana


Latest Images